Monday, December 10, 2012

Holiday Safety Tips


Have Yourself a Safe Little Christmas

Keep your holidays happy by following these easy safety tips:


It's that time of year again. Time to deck the halls, hang the stockings and create your very own winter wonderland. However, before you jingle your first bell, you should develop a holiday safety plan for your family and home.
Your plan should start with your tree. If its a natural Christmas tree, keep it away from heavy traffic it won't be bumped into. Make sure the tree is protected from heaters, stoves and fireplaces, and never use lighted candles to decorate a live or artificial tree.


Before you hang Christmas lights, make sure all the strands and extension cords are manufactured and approved for outdoor use. Examine each strand for damaged bulbs or worn areas. If you discover a string of lights with exposed wires, throw it away and buy a new set.
Christmas light safety

When decorating your tree, use only CSA-approved lights, which signifies the lights have been properly
tested and meet specific safety regulations. Use no more than three strands of lights linked together and avoid placing paper ornaments on tree lights. Over time, the bulbs can become hot enough to light thin paper ornaments on fire.
If your decorating ideas include plants to add holiday color to your home, bear in mind that several holiday-associated plants like mistletoe and poinsettias are poisonous to small children and pets. Be sure to keep the plants up high where curious snoopers can't reach.

Outdoor decorating
It's important to use caution and common sense when decorating the outside of your home for the holidays. Always use a sturdy ladder and watch your footing. If possible, have someone help you put your festive accessories in place.


When connecting strings of lights to your home, use plastic or rubber clips to keep the wires from touching metal objects. Make sure the bulbs are facing down so moisture won't get into the sockets. If you combine two or three strands of lights, you can weather-proof the connections by wrapping the plugs with plastic bags and all-weather tape.

It's best to avoid placing statues or figurines on your home's roof. High winds, driving sleet or heavy snow can rip the figures from their foundations and damage yours and nearby homes or injure neighbors.
Follow these tips and you can concern yourself with more pleasurable pastimes such as visions of sugarplums and sneaking kisses under the mistletoe.


Have a Safe and Happy Christmas Season!


Monday, December 3, 2012

December Home Maintenance


December Home Maintenance 

Congratulations on completing a year of home maintenance! For many of us, December is a month for celebrations, family gatherings and vacations. But if you find yourself prowling the house, feeling the need to do something useful, we have a holiday wish list for your home.

When the first major snowfall of the year hits — and it's likely to be this month if you live in North of the 401 — take advantage of the event to learn things about your house that only snow can show. Is the snow melting from your roof rapidly? That means heat is escaping from your home through the roof and you should consider adding some attic insulation. Rapid formation of icicles without a thaw is another indication that you're losing heat through the roof.

If you find that you are losing a lot of heat through your roof, take a look at the insulation in your attic floor. It should be uniformly thick and distributed evenly with no gaps. The vapor barrier side should be facing downward — toward the living space you are trying to keep warm. Also, the insulation should be dry.


Is your home properly insulated?

There are many chores that need doing after a big snow; consider the tasks as your excuse to get outside and enjoy winter.

Clear walkways with a snow shovel and sprinkle sand or salt on them for traction. (Be careful with the salt, though — it can leach into flower beds and is hard on pets' feet.)
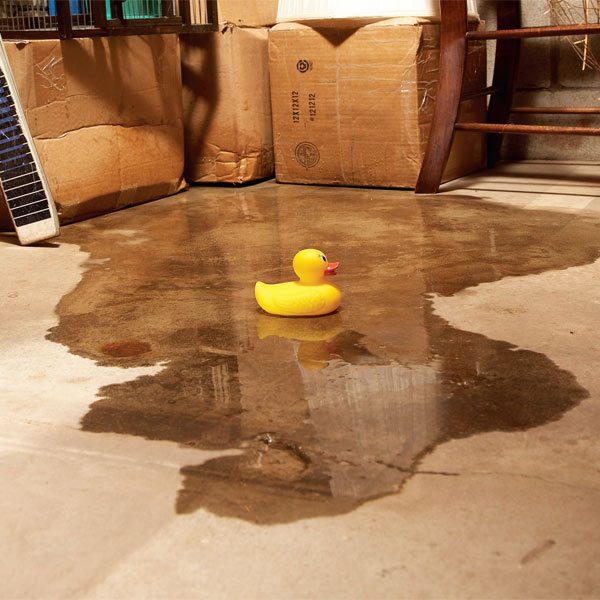
Check your roof for ice dams and break them up to release water if necessary. 
Frozen dams along the eaves cause melted snow to puddle above and possibly leak through the roof.

Knock snow from tree branches to keep them from breaking under the weight.
Consider sweeping snow from roofs that have shallow angles or little support (sheds, carports, lean-tos) if it can be done safely.

Professional Services

Find local plumbers, electricians, contractors and more.
As a temporary measure to get through a cold winter with pipes intact, block north-facing crawl-space vents with a piece of plywood.

If an unusual cold snap is predicted and you live in an older, not-so-well-insulated house, leave the sink and bathtub faucets on at a slow trickle to keep pipes from freezing. This is especially important if the heat is turned off in the house for any period; for example, during the day when the house is empty.
If you have oil heat, you can save fuel and repair costs by cleaning some parts of the oil burner yourself. Turn off power to the system, lift the blower cover and then dust the blades of the blower. Lubricate the motor by pouring oil in the oil cups. If you're ambitious, you can even clean the oil strainer and replace the filter. Check the owner's manual to get details on do-it-yourself maintenance for your oil burner.

Winterizing Your Home

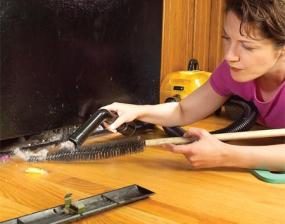
If you have forced-air heating ducts, check ducts once a year for leaks and seal with (yes) duct tape. Routinely vacuum dust from duct grilles, and have the entire system professionally cleaned annually, or as recommended by your heating system's maintenance manual.

If mice have invaded your home despite efforts to keep them out, don't be soft-hearted. They can do damage that ranges from leaving a mess of droppings to chewing your home's wires, which can burn your house down. First, discern whether you have rats or mice: Rats make a lot of noise and leave half-inch droppings. Next, buy a dozen appropriately sized traps, bait half of them (peanut butter works well and is cheap) and place them without setting them. After the rodents have taken the first bait, rebait and set all the traps in one fell swoop. Wear gloves to dispose of the rodents, trap and all. (Do not try to reuse traps or you'll have a harder time going through with the chore.) Mice and rats breed like ... well, rabbits, so keep repeating this cycle until you see no new evidence of these unwelcome, hazardous houseguests.

Take time to evaluate your home's emergency kit. A battery-powered radio, a first-aid kit, blankets, several gallons of fresh water, tools for shutting off gas and water lines, candles and matches, flashlights and batteries should all be included. Check the batteries — they can drain with time, even if not used. If you live in an area with extremely cold winters, make sure you have a backup heat supply, whether it's a wood stove and a well-stocked woodshed, or a backup generator.

Winter is the perfect time of year to itemize what changes you'd like to make in your house … because you're cooped up in it!

Take a day to sit and make a list of what you'd like 
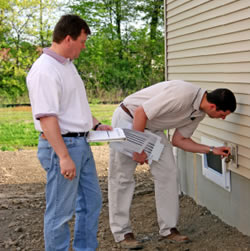
changed, from new throw rugs to a complete remodel. If a remodeling job is on your list and you want to begin as soon as the weather warms, start talking to contractors this month. If you just bought a home, live in it for a full year before you undertake a major remodel. Become intimate with your house; watch how it interacts with its environment through spring, summer, fall and winter. This will help you decide what you truly need — and keep you from putting a sunroom in a spot that gets sun only two months out of the year.

Wednesday, October 31, 2012

November Maintenance Tips


November is a good month to move some maintenance efforts indoors. This month also provides an opportunity to see if your hard work during earlier months paid off — nothing tests waterproofing efforts like a hard November rain.

Maintain large appliances
Clean coilsAs the holiday season begins, make sure your appliances are prepared for the demands you will place on them. Pull your refrigerator from the wall and clean the condenser coils in back with a vacuum cleaner with a brush attachment. Also, vacuum dust from the front lower grille and clean the drip pan and the drain leading to it (if your unit has one). Clean the oven and stove drip pans on your electric range. Clean the surface burner on your gas stove to ensure proper flame level. De-stench your in-sink garbage disposal by packing it with ice cubes and 1/4 cup of baking soda; then turn it on. After the ice-grinding noise stops, pour a kettle full of boiling water into the sink. Check the dishwasher strainer and washer arm; clean if necessary.

Clean and maintain closets
Go to your closets and perform these two simple tests: Can you see floor space, and can you easily close the door? If the answer to either one of these questions is no, clean your closet. Cramped closets can provide haven for pests, too-full racks can break free from walls, and sliding doors can be derailed by too much stuff. Add compartments and hanging racks at different levels to utilize more space.

Maintain woodwork
November is a good month to repair and re-glue woodwork, since indoor air is at its driest. If you are re-gluing wobbly dining room chairs, clamp during drying by wrapping a rope tightly around the perimeter of the legs. Be sure to protect wood surfaces with cardboard before tightening rope. Try using toothpaste on white water stains on wood surfaces. Once the stain is removed, polish with furniture polish. Use paste wax and elbow grease to put a new sheen on wood furniture.

Clear leaves from gutters
Cleaning gutters is a slimy job, but the task will protect your siding and basement from expensive water damage. Don long rubber gloves, grab a gallon bucket and scoop leaves into the bucket by hand. Trying to use a garden trowel or other device just makes the task more cumbersome and can damage gutters. Blast the scum from the bottom of the gutter with a hose equipped with a pressure nozzle. If it doesn't drain well, feed your running hose up the pipe to knock loose the clog. Dump the contents of the bucket on your compost pile and pat yourself on the back for a dirty job well done.
  
Speaking of leaves ...
Check some other places where accumulated leaves can be a problem. If leaves are piled in the valleys of your roof, they can retain water and initiate leaks. Walk your property with a shovel and clear drainage ditches and culverts of leaf buildup. Also, a moderate amount of leaves on a lawn can provide a natural mulch, but if large amounts are left to soak up winter rains, they will smother the grass beneath them.

Have problem trees trimmed
Now that you've cleaned your gutters, you know which trees are dumping leaves on your roof, shading it enough to encourage moss, and close enough to cause serious damage should they lose a branch in a storm. Trees are dormant this time of the year and can withstand extensive pruning. Decide which ones need cutting back and hire a professional to do the job. This is not a do-it-yourself task if the trees you are looking at are high enough to affect your roof. Trimming large trees is a dangerous job that should be left to an expert.

Maintain moisture
Heaters, especially forced air and wood stoves, can rob a home of humidity. A touch of moisture in the air makes heated air feel warmer, so you can keep the heat at a slightly lower temperature if your humidity is balanced. If your woodwork is cracking or your skin seems excessively dry, you need more moisture in your home. A furnace-mounted humidifier is likely the answer if your home has central forced-air heat and other measures don't moisten things up. If you have a wood stove, put a non-whistling teakettle on it and add water regularly (check it daily to make sure the water hasn't evaporated). If you prefer not to go by feel, buy an inexpensive instrument called a hygrometer that measures humidity.

Check your sump pump
Some unfinished basements in wet areas have sump pumps installed. These pumps switch on automatically when groundwater levels rise, eliminating basement water before it becomes a problem. If you have one, make sure it is in good working order before the rainy season starts.

Thursday, October 25, 2012

Orangeburg Pipe


Orangeburg pipes
Orangeburg pipes are main waste lines that typically join to cast iron.  The connection is done underground so you will not be able to see it.  The pipes are made of paper and tar and formed into a pipe connecting to the city waste line.  Used in the 50’s and 60’s (when iron was re-directed to the war effort), the material breaks down over time.  This can be accelerated by various products that run through the drain (including chemicals, nail polish remover, etc. that are put down drains) and snaking or cleaning these pipes can also cause more damage.

Bituminized fiber drain and sewer pipe (a.k.a. Orangeburg pipe; Bermico pipe).


Manufactured in Orangeburg South Carolina, the pipe later adopted this name
Orangeburg pipe was used in the 1950’s and 1960’s when all cast was being used for the war effort.  The joint for these pipes is below ground and therefore, you will not be able to see it and it was used with interior cast drains. The pipes are now failing and need replacement, as they tend to collapse over time.  Some companies will line the existing pipe, but this will not always be possible as the pipe in many cases changes to an oval shape as it weakens and before it collapses completely. 
Excerpt from the following site:  http://www.civil.uwaterloo.ca/catt/history.html
In the early 1990s, the City of Waterloo began experiencing premature failures of Black Fibre Pipe (also known as Orangeburg or Bermico pipes) sewer laterals that were in-service for less than 20 years. Black fibre pipes, 51 to 200 mm (2 and 8 in.) in diameter, are compressed paper fibre tubes that are vacuum impregnated with bituminous coal tar pitch to form a pipe composed of approximately 25% fibre stock and 75% bitumen.

During World War II, governments mandated limited domestic use of steel to aid the war effort. This and the lower manufacturing cost of black fibre pipe as compared to steel, clay, and concrete pipes led to the rapid usage of black fibre pipe for sanitary laterals, drains, and conduits. Black fibre pipe remained a popular choice for sewer laterals following the end of the war, until the late 1960s, when plastic pipes were introduced. During the 1950s and 1960s, a period of rapid growth at the City of Waterloo, approximately 4,000 residential sewer laterals consisting of black fibre pipes were installed.
Soon after the installation of those black fibre laterals, home owners began experiencing sewer back-ups due to the collapse of pipes. Initially the failed house laterals were replaced by new pipes using open-cut excavation from the houses to the streets. The open-cut construction took several days to complete, was disruptive to both homeowners and city residents, and cost approximately $6500 per lateral. Since the homeowner owned the lateral, the construction cost was shared between the home owner and the City. Due to the large number of premature failures and construction issues, the City of Waterloo decided to assume the full cost of replacing failed black fibre pipe sewer laterals. As a result of this decision, the City of Waterloo had to assume $26 million dollar liability.
There are a few videos available on YouTube showing the product.  The following link is from a plumbing contractor that has worked with the product in the US..


Lining the pipe – an easy fix, but only possible if the pipes are still round


Potential Solution

One inspector mentioned that whenever a house is over 50 years old, he recommends they have a plumber scope the main waste line – costs vary but are typically around $300.  Considering the potential damage and increased chances of root damage, blockages and the impact on a family when these and other older drains fail, it is a recommendation to take under consideration.  We do not have any statistics on where they are used, except in the Waterloo region, Orangeville and Toronto.

Tuesday, October 16, 2012

15 Tips for lowering your heating bill


15 Tips for lowering your heating bill

Save cash every month by saving energy in your home. Follow these tips to lower your heating bill and make your house more energy efficient.
It's not the snow banks, bad driving or dark-side-of-the-moon type temperatures that frighten Canadians about winter; it's the cost of keeping warm. It's expensive, it's unavoidable and it's likely to go on until May or so, depending on your zone. But there are things we can do to lessen the blow. Here are 15 tips to take some of the bite out of those heating bills.

1. How well is your home insulated? Here's a little experiment: the next time your neighbourhood gets a dusting of fresh snow, go take a look around. Some roofs will hold the snow and some will melt it from underneath. You want a roof that holds the snow -- that's a sure sign of a well-insulated roof. The bare roof is a sure sign of heat loss.

2. Get your furnace serviced. A well-running, clean furnace is an efficient furnace -- and a safer furnace. Check into service plans you can purchase. 

3. If your furnace is old and inefficient, think about replacing it with a new, energy-efficient model. Check with your municipality and provincial government about any incentive plans or rebates, and look into the Government of Canada's ecoEnergy Retrofit program, which offers grants to help make homes more energy efficient.

4. Heat yourself first, then the house. Put on a sweater, socks and cosy slippers. Snuggle up on the sofa with a blanket when watching television or reading a magazine. Then turn that thermostat down to 68°F or 20°C -- still a comfortable temperature, but one that will save you money.

5. Check your house for drafts, and install weather stripping where needed, as well as clear plastic sheeting over windows in as many rooms as you can.

6. Close off unused rooms. Shutting doors means you'll only heat the rooms you use most often. Close vents in unused rooms, too. On the other hand, do heat the basement -- even if you don't go down there much. A cold basement will make the first floor of your house feel cold.

7. If you have a wood-burning fireplace, remember to shut the flue when it's not in use. Heat will fly right up and out if you don't.

8. Close the curtains or blinds over windows at night to help keep precious heat in; open them all up during the day to collect free heat from the sun.
9. Craft or buy door and window draft snakes -- they really do help, and they're adorable.

10. Don't heat the house for Bubbles the goldfish. When you go to work, turn the thermostat down to 60°F or 16°C. Even if you have a dog or cat, they'll be fine. After all, they're wearing a fur coat and love to burrow in blankets.

11. Install a programmable thermostat. Set it to lower the temperature at bedtime and when you leave for work, and to warm up before you get home or crawl out from under the duvet.

12. Don't sleep in a sauna. Turn the temperature down to 60°F or 16°C while you're all bundled up in blankets. And speaking of bedtime, try wearing fluffy socks at night.


13. How is your home heated? Right now, natural gas is generally the cheapest way to go. But what to do if your old house is devoid of ductwork because when electricity was cheaper, the previous owner put in mega-watt-sucking baseboard heaters? 

Well, you could do a major renovation or you could invest in a gas room-heater or fireplace. They're relatively inexpensive -- units can start at $2,000, installed -- and considering the value and warmth one would add to your abode, the cost is totally worth it.

14. Install ceiling fans to push the hot air back down to people level and circulate the warmth.

15. Just finished baking or roasting something in the oven? Leave the oven door ajar and use that heat for an extra blast of warmth in the kitchen.

Between the holiday feasts and buying gifts, winter can be a challenging time to save money. But by adopting a few good heating habits, we can cut back on waste, and that's money in the bank.

Friday, October 12, 2012

October Winterization


October  Winterization
October is the first full month of fall; by the end of this month, most of your winterization should be completed. Falling leaves and dwindling daylight signal a final opportunity to do some outdoor organizing before winter settles in.

Repair roof shingles
Try to do this on a warm day if you have asphalt shingles on your roof, so the shingles will be flexible. Use roofing cement to seal cracked and torn shingles and to reattach curled shingles. Then tack down the damage further with galvanized roofing nails, and cover the exposed nail heads with roofing cement. Split wood shingles can be patched with roofing cement as well.

Repair siding
Do a fall siding inspection and remedy any problems you find. Look for damaged paint, warped or split
wood, cracks or holes in stucco, and missing or slipped siding panels. Your repair tool kit will depend on what kind of siding you have: For example, wood siding may require wood putty, waterproof glue, nails and screws; stucco may require wire mesh, stucco patching compound, a trowel and a chisel. Most types of siding require a coating of sealant or primer, and paint to finish the repair and ensure waterproofing.


Reinforce windows
Replace your screens with storm windows. If your screens are dirty or damaged, repair and clean before storing them to prevent further deterioration. Light scrubbing followed by a blast from a hose will eliminate bird droppings and other grime. Small tears can be sewn up with thin wire. If you have older single-pane windows and no storm coverings, apply heat-shrink plastic to the inner or outer window frame to create an insulating air space and save heating expense.

Fire fluency
Make sure your damper is in good working order by opening and shutting it prior to lighting the first fire of the season. If you didn't clean your chimney at the end of the heating season, do it now — especially if you burn soft woods, which release more creosote. Often the first indication that a chimney needs cleaning is a chimney fire, so preventive maintenance is important.


Detect deadly gas
If you heat your home with wood heat or a gas heater, a carbon-monoxide detector is a must. These devices look and sound like smoke detectors, but they detect carbon-monoxide gas instead. Units that plug into an outlet are also available.

Check batteries in smoke detectors

Daylight saving time ends Nov. 7. Get into the habit of checking smoke-
.
detector batteries when you "fall back" and "spring ahead." Also make sure household fire extinguishers are fully pressurized and in good working order.

Close seasonal air conditioners
If you live in a place where air conditioners are used seasonally instead of year-round, this is a good month to close them down. Switch off power, make sure the condensate drain is clear, and clean condenser coils and filters (a vacuum will do). Either remove window units or cover                       ............................................... them, to protect your home from drafts and the units from inclement weather.

Bleed air from radiators
Radiators can get air pockets in them when not in use. If air pockets stay, they will keep the unit from heating up to its full capacity. If your unit doesn't have automatic air valves, you need to bleed it prior to every heating season. To bleed air out, turn on the furnace and circulator and open the supply valve to the radiator. Find the bleeder valve (it's usually opposite the supply valve) and open it while holding a pan to it. Air should be released, followed by hot water (thus the pan). Close the valve as the water comes out. Lightly feel the radiator to make sure it is heated along its entire surface; if there are gaps, repeat the procedure.

Cut brush back from the house
Before stowing all of your gardening equipment for the winter, walk around your house with a weed whacker and a pair of pruners and cut back any brush, weeds or branches that contact your house. This task will eliminate a common access point for insects, rodents and rot. It will also keep branches and shrubs from scraping away at your siding during windstorms.

Watch those leaves
If you don't want the tannin in fall leaves to leave hard-to-clean imprints on your deck and concrete walkways, keep those surfaces leaf-free. If you do get some leaf prints, try a solution of half water and half bleach (test it first in an unobtrusive spot — it may lighten the wood on your deck) or trisodium phosphate (commonly known as TSP) and warm water. Or, just leave the prints and consider them an artistic addition to your exterior look.

Bottom of Form
Winterize external plumbing systems


This is the most important job of fall if you live in an area that freezes in the winter. The simple fact that water expands upon freezing has caused countless homeowners innumerable woes. Ignore this job and flooding, water damage and thousands of dollar’s worth of plumbing bills will be your constant winter companions.


Here's your to-do list:
·         Drain underground sprinkler systems. 
·         Have outdoor pools drained and professionally serviced.  
·         Drain exterior water pipes and any pipes that run through unheated areas (such as a garage, crawl space or unheated porch). If draining these pipes isn't possible, wrap them with foam insulation or heat tape. 
·         Cover exposed spigots with foam covers. Or, if cosmetics and ease of removal don't matter, wrap spigots in layers of newspaper, cover the newspaper with a plastic bag, and seal the whole affair with duct tape. 
·         Drain and store garden hoses. Leave one hose and nozzle somewhere that's easily accessible; you'll need it for gutter cleaning and car washing.

Monday, October 1, 2012

Why should you have your furnace serviced?


Why should you have your furnace serviced?
Pass this tip on to your clients.


Heating season is here. But before you turn up the heat, have your system serviced first. I have found that many people do not service their furnaces every year. In fact, from the look of these furnaces, we wonder if any have ever been serviced.

If you are tempted to check your heating system yourself, we suggest you resist temptation. Unless you are a heating technician, you will not likely detect problems in your system with great accuracy. This is one system that requires a licensed technician.

Here’s why a yearly service by a qualified technician is important:

Health and Safety
Your heating system burns fuel. In a well-functioning system, the heat from the combustion process goes into your house while the combustion gasses vent outside. There are several reasons why combustion gasses may end up flowing into the house. If an animal builds its home in your chimney, for example, combustion gasses can back up into your house. Combustion gasses that leak into your house present health and safety hazards. In a worst-case scenario, carbon monoxide poisoning can lead to death.

When a technician services your heating system, he or she should verify the flow of combustion gasses. The technician will also look for leaking natural gas or oil and check for proper ignition. Once again, health and safety are the concern.

Efficiency
A well-tuned heating system is more efficient. This is good for the environment and saves you money. A quick adjustment of the fuel mixture in your heating system may make all the difference. Again, this is something only a technician can assess.

Keep It Running
A well-maintained heating system will last longer. If you service your furnace yearly, any adverse conditions will only have an opportunity to damage your furnace for, at most, one season. For instance, if you call a technician at the beginning of the winter, he or she may find a problem, such as a condensation leak, in your high efficiency furnace. The condensate from a high efficiency furnace is fairly corrosive and can damage your furnace. If the problem were left for several years, the furnace would fail before its intended life expectancy.

Inexpensive Peace of Mind
A yearly service call by a qualified heating technician is not expensive and the job doesn’t take long. If the technician does not find anything wrong, the fee will be in the order of $100 to $140. If the technician does find something wrong, it is better to know about it now, before the problem gets worse and costs much more.

If the prospect of an unexpected repair does not appeal to you, you can buy a basic warranty package that will cover the cost of many of these repairs. Before you buy the warranty, however, read the fine print: not all warranties are the same. Some exclude virtually everything that can go wrong, rendering them useless.

What Can You Do Yourself?
There are a few things you can do yourself. You can clean or replace the furnace filter; clean the humidifier, if you have one; bleed the hot water radiators, if you have a hot water system, just to mention a few. Do-it-yourself maintenance is important, but your heating system needs professional servicing to keep it running at peak efficiency, ensuring your health and safety.

Tuesday, September 25, 2012

Wet Basement

Wet Basement

A wet basement can be just a nuisance or even real nightmare. Each year, thousands of homeowners are faced with the unpleasant side effects of seasonal rainfall. Problems they can face range from just dampness to even flooding. Chronic basement leakage is a serious problem that can destroy personal property, furnishings, appliances, and sometimes even cause permanent structural damage to a homes foundation. Excessive moisture is a huge attraction to wood-eating insects, wood rot and decay.

Despite the pervasiveness of the problem, few homeowners are aware of the causes of water leakage.

Some Common Causes

One common cause of basement leakage is improper surface drainage, such as a yard sloped toward the home. In many cases, the problem can be greatly alleviated by re-grading the yard to slope away from the homes foundation or diverting surface water around the house.

Other common culprits include poorly positioned rain gutter downspouts, missing, leaking or clogged rain gutters. A downspout that is improperly positioned to drain against the side of the house, allows water to build up along the foundation wall, until the backed-up "reservoir" finds a weak spot in the foundation wall.

The most difficult cause of basement leakage is a high water table. A high water table problem occurs when the home is built too deeply in the ground, into the level where water remains constant throughout the year. A high water table problem can also be caused by under ground springs or sustained periods of rainfall that cause the water table to rise during the wet seasons.

Is it Leakage or Condensation?

You should try to determine if your problem is actually water "leaking" in or if it's just condensation forming on the cool surfaces. Condensation occurs when warm, humid air comes into contact with cooler basement walls, floors, water pipes etc.

As an example, just take a cold bottle of soda out of your refrigerator and set it on the counter. After several minutes, you'll notice steam forming on the outside of the bottle. After many minutes pass, you will see a small puddle of water forming at the base of the bottle, as the beads of moisture start dripping down. This is a classic example of condensation, not "leakage". If your basement is actually leaking, the water should not just "appear". You should be able to see where it's coming in as it leaks, in the form of a puddle or stream or water.

Helpful Tips

Your rain gutters should be cleaned of leaves and debris at least once per year.

Downspouts should direct water runoff from the roof to a discharge point at least several feet away from the homes foundation. Use a splash block at the end of your downspout to avoid soil erosion. Never bury your downspout lines unless you can empty them out to daylight.

Buy a good dehumidifier to lower the natural humidity level in your basement. Make sure your dehumidifier is the proper size for your basement. Ask for a drain hose attachment so you don't have to empty the water collected every day. Get a unit with a built-in de-icer. Dehumidifiers are actually refrigeration coils and can freeze up and stop working.

Keep the doors and windows to your basement closed, year round. Opened doors and windows allow extra humidity to enter your basement, causing condensation. Your dehumidifier will also run less.

Waterproofing Paints and Sealers

There are several good waterproofing paints and sealers on the market today. Waterproof paints and sealers can work well for minor dampness on walls and floors. Pay special attention to the preparation instructions from the products manufacturer. Be aware though, interior waterproof paints and sealers don't do anything to alleviate the "source" of the problem.


Time For a Professional?


A professional basement waterproofing contractor can offer you a variety of solutions, depending on the source of your problem. Methods can include outside excavation, installation of drain tile, parging your walls, interior drainage systems or epoxy cove systems


In Conclusion

Prevention is always the first and best approach. Look closely at the grading around your property and make sure your rain gutters are in good working order. Get a good quality dehumidifier to reduce humidity in your basement.

If you've done your best to correct your problem and it still leaks, it might be best to bring in a professional. Check companies for local references, ask for a certificate of insurance, check the companies warranty to see what's covered and check them out with your local Better Business Bureau.


Tuesday, September 11, 2012

Why do I need a Home Inspection?

x


A home inspection prior to purchasing a home or condominium can bring peace of mind when you sign the sales contract. Knowing what to expect both inside and out will help you make an informed decision about the value of the home and the future upkeep.

A home inspection accomplishes two important goals. First, it gives you a chance to determine the condition of the house, its structural soundness, and the condition of its mechanical systems. Second, it brings any problems to the seller’s attention at a time when they can be resolved before closing a sale.

A comprehensive inspection includes a visual examination of the structure from top to bottom, including the heating, air conditioning systems, the interior plumbing and electrical systems, the roof and visible insulation, walls, ceilings, floors, windows and doors, the foundation, basement and visible structure.

Following the examination, the inspector will provide a report that not only points out possible defects or areas of concerns, but also the positive aspects of the structure as well as the type of maintenance that will be necessary to keep the home in good shape.

Even the most experienced homeowners lack the knowledge and expertise of a professional inspection firm. For example, watermarks in the basement may indicate a chronic seepage problem, or simply may be a result of a single incident.

A professional assessment will provide complete information about the condition of the property you are considering and will help avoid any unpleasant surprises after the sale. In addition, a home inspector can remain totally objective, while you as a prospective homebuyer may be emotionally involved.

The inspection fee for a typical single-family house can vary depending upon the geographic area. The particular features of the home such as size, age and special structures will be taken into consideration. A decision to have a home inspected is a good investment. You might save many times the cost of inspection by being aware of defects, maintenance requirements, and upgrading requirements.

Good decorating should not sell you on a house. Remember, you’re also buying structural and mechanical systems. Walk through a house twice before you hire an inspector. The first time, look at the rooms, the floor plan, and envision your own decorating ideas for the house. The second time, go back and look at the condition of the walls, doors, appliance, and plumbing. If the home still looks good after two visits and you’re getting serious about the purchase, hire an inspector.

When interviewing a potential home inspection firm, carefully inquire about the specifics of their work and company. Ask how long they have been in business, ask for references from previous customers. Find out what type of insurance they carry.

A home inspection usually lasts about three hours. Professional inspection companies will be happy to answer all your questions. Avoid firms that issue only a verbal report. The report should be in narrative form, not just a checklist of items inspected. The home inspector should also issue a written report. You may find it valuable to accompany the inspector as he goes through the house. Calgary Home Inspection

Checklist for Selling your Home


Making the right first impression is critical, it drives more traffic to the house and helps potential
buyers focus on the overall home and improve your chances of selling – at your price. In many
instances, the potential buyer will know within minutes whether the house meets their needs or
not. This checklist, along with the advice of your Realtor will help focus on the maintenance
issues that can help your home sell quicker and for a better price.

Check the major systems
After location and style of the home, the needs of a homebuyer move to the condition of the
basic structure and major mechanical systems. Most buyers are not prepared to spend money
correcting problems in such critical areas. Your own thorough investigation of the following
major items can help determine if any issues exist. The most critical areas to check include:
· Roof structure and covering – look for damage, worn areas and water leaks.
· Foundation, basement, and/or crawl space – any foundation cracks or water leaks should be
repaired
· Central heating and air conditioning systems – these units can be professionally cleaned and
serviced to ensure proper working condition. You can check for signs of rust or black stains
that may indicate a more serious concern
· Electrical system and plumbing systems are not for the layman, but if you have any recurring
issues, have a professional determine and repair those concerns.

Make maintenance improvements
The maintenance improvements listed below are relatively easy and inexpensive to make, yet
they can substantially improve a home's appearance, efficiency and comfort:
· Apply new caulking and weather‐stripping as needed around windows and doors.
· Clean gutters and extensions of debris and leaves to ensure proper drainage
· Re‐grade soil around the house to prevent water pooling at the foundation
· Replace or re‐grout tiles and caulking in the bathrooms to help improve appearance and
reduce the risk of moisture getting behind tiles.
· Ventilate closed basements, cold rooms and crawl spaces, or install a dehumidifier to
prevent musty smells, humidity build‐up, and moisture.
· Wash or Replace dirty filters in the heating and ventilating systems, including furnace, HRV,
humidifier, etc.

Pay attention to details
Fixing even minor items can go a long way toward improving the first impression of your
home. Here are some improvements, which you might consider:
· Repair any leaking faucets / drains and seal around sinks with caulking
· Tighten loose doorknobs – ensure doors close easily and smoothly
· Replace damaged screens or broken panes of glass
· Replace burned‐out light bulbs, and replace broken light fixtures
· Secure loose railings
· Patch small holes in walls and ceilings and repaint / remove or repair wallpaper
· Repair and coat the driveway.

Take safety precautions
Pay attention to items relating to protecting the home and its occupants from danger. The
following are important safety precautions which home buyer's will appreciate, are relatively
easy to implement and shouldn't cost a lot. Moreover, they will keep you safe while selling:
· Install good quality smoke and carbon monoxide detectors
· Ensure adequate outdoor lighting, especially in suburban and
rural locales
· Install 'GFCI' outlets outdoors and in wet locations such as
bath & laundry areas.
· Keep the stairwells tidy and free of debris and obstructions,
and leave plenty of clearance around the garage door,
electrical panel and furnace.
· Keep flammables and combustables away from the furnace
and other utility areas.
· If you have direct entry from the garage to the interior of the home, consider installing a
self‐closing device on the door.

Prepare for the buyer's inspection
More and more purchasers are requesting pre‐purchase inspections. It is a good idea to
assemble in advance the various house records that can be used to
answer questions from the purchaser and their inspector.
· Appliance receipts, service records and warranties
· Information on the age of major components such as 
  the roof
coverings, furnace, air‐conditioner, etc.
· Major component warranties (e.g. roofing, siding, windows,
carpeting, furnace and other appliances
· Heating, water & electric bills from at least the past 12 months

How did your house measure up?
Hopefully, this home seller's checklist has helped you gain a clearer knowledge of your home'soverall condition ‐ from a buyer's perspective. Now you can make repairs or improvements that will increase your home's marketability. It just makes good sense! Of course, even if your house is already in optimum condition, a professional home inspection can also be a good marketing tool. At the end of the inspection, the original copy of the inspection report will be given to you. This can then be put on display for all interested parties to view as they are viewing your home. In addition a full copy of the inspection report & a summary will be putonline for your realtor to use in the marketing of your home. This will increase your chances of attracting offers that are free of the home inspection condition.